Create Your First Project
Provisioning a Supabase project — your managed Postgres database server — and finding the keys your app needs to connect to it.
A Supabase project is your dedicated database server. It is a real Postgres database running on Supabase's infrastructure, given a unique URL, locked with a master password, and accessible from anywhere in the world. Creating a project is the moment your backend comes online.
Why First
Think about what happens when you set up a new filing system at a CA firm branch office. You need to:
- Allocate a physical room (the server)
- Install the filing cabinets (the database)
- Create a master key (the database password)
- Set the office's address so staff can find it (the project URL)
- Decide which city the office is in (the region)
When you do this manually, it takes days — vendor procurement, IT setup, network configuration. When a Supabase project is created, all five of these happen automatically in about 90 seconds. You choose the name, the password, and the region. Supabase handles everything else.
Creating the Project
Click "New project"
From the Supabase dashboard home, click the large "New project" card (or the green "New project" button if you already have other projects). You are taken to the project creation form.
Set the organisation
The first dropdown says "Organisation." For training, leave it set to "Personal." If you are creating a project for a client team, select the team organisation here.
Name your project
Type a project name in the "Name" field.
Naming rules:
- Use lowercase letters, numbers, and hyphens only
- No spaces — Supabase uses the name in URLs and identifiers
- Keep it short and descriptive
- Examples:
my-school-app,aurora-public-school-training,ca-firm-portal
The name is only for your reference in the Supabase dashboard. Your app code uses the project URL, not the name.
Set the database password
This is the single most important step in this entire lesson.
Click "Generate a password" — Supabase generates a strong random password for you. Copy it immediately.
Do this right now before proceeding:
- Open VaultMate on your computer
- Find or create the project entry for this app
- Add the database password under the title "Supabase DB Password" in the "Database" category
- Save
This password is the master key to your entire database. It grants full access to every table, every row, every user record — with no RLS restrictions. If you lose it and need to reset it, all active connections break and your app goes down. If you expose it publicly, your database is fully compromised.
Save it to VaultMate immediately. Do not write it on paper. Do not paste it in a WhatsApp message to yourself. Do not put it in a note app. VaultMate only.
Choose your region
The region is the physical location of the servers that will run your database. Closer to your users means faster response times.
For India-based projects, choose:
- ap-south-1 — Mumbai, AWS (closest to most Indian users)
- ap-southeast-1 — Singapore (slightly further, sometimes more available)
For training projects, either is fine. For production client apps, use Mumbai.
Choose the plan
Leave it on Free. The free tier gives you:
- 500 MB database storage
- 5 GB file storage
- 50,000 monthly active users for auth
- 2 projects maximum
This is enough for every project in this training program. You upgrade to Pro when a live production app needs more.
Click "Create new project"
Click the green "Create new project" button. A progress screen appears showing the database being provisioned. This takes 60–90 seconds. Do not close the tab.
When it completes, you land on the project overview screen — the home screen for this specific project.
The Project Overview Screen
When provisioning finishes, you see your project's home screen. Key elements:
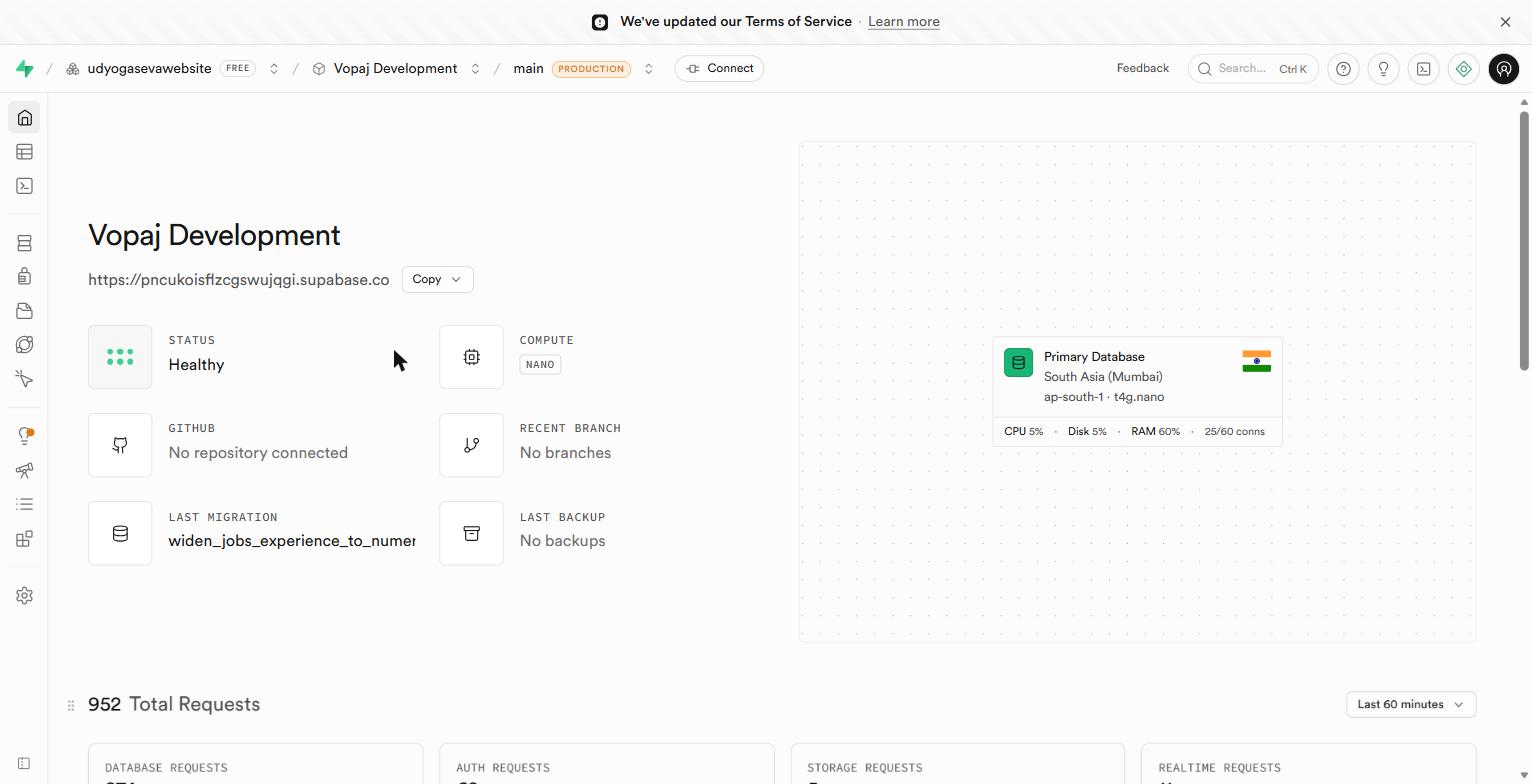 The project home screen — sidebar fully populated, database health green, getting-started panel in the centre.
- Top bar: Your project name on the left, a "Connect" button, and your account avatar
- Left sidebar: Now fully populated — Table Editor, SQL Editor, Database, Auth, Storage, Edge Functions, Reports, API, Settings
- Centre: A "Getting started" panel with quick-start guides. You can ignore these — this training covers everything they contain.
- Database health panel: Green indicators showing your database is running normally
Finding Your Connection Details
Your app needs three pieces of information to connect to this database. All three live in Settings.
Open Settings
Click "Settings" at the very bottom of the left sidebar. Then click "API" in the sub-menu that appears.
 The Settings area. From here you'll navigate to API, Database, and Auth sub-pages.
Find your Project URL
Under "Project URL," you see a URL that looks like:
The xyzabcdef123456 part is your project's unique identifier. This is the address of your database server — the URL your React app uses to send all requests to Supabase.
Find your API keys
Under "Project API Keys," you see two keys:
anon / public key
A long string starting with eyJ.... This key is safe to put in your frontend React code. It has limited permissions — it can only do what your Row Level Security rules allow. This is not a secret.
service_role key
Another long string starting with eyJ.... This key is never used in frontend code. Ever.
The service_role key bypasses ALL security rules.
When you use the service role key, Row Level Security does not apply. Every RLS policy you write is ignored. This key can read every row from every table, delete any record, and access every user's data — regardless of what your security rules say.
If this key appears in your React frontend code, in a .env file committed to GitHub, or in a WhatsApp message, your entire database is exposed to anyone who finds it.
Rule: service role key is used only in Edge Functions (which run on Supabase's servers, not in the browser). Never in the client.
Save Your Keys to VaultMate
Before you do anything else with this project:
- Open VaultMate
- Find your project entry (or create one)
- Save the following:
| What to save | VaultMate title | Category |
|---|---|---|
| Project URL | Supabase Project URL | Database |
anon / public key | Supabase Anon Key | API Key |
service_role key | Supabase Service Role Key | API Key |
| Database password (from creation) | Supabase DB Password | Database |
Summary
| Step | What you chose |
|---|---|
| Project name | A lowercase, hyphenated name |
| Database password | Generated, saved to VaultMate immediately |
| Region | ap-south-1 (Mumbai) for India |
| Plan | Free |
Your project is live. Your database is running. In the next lesson, you start filling it with data.