Creating and Using the API Key
Generate a Resend API key, save it correctly, add it as a Supabase secret, and send your first test email from an edge function.
The API key is the password your code uses to talk to Resend. Without it, your edge function cannot send a single email. With it, sending an email is five lines of TypeScript.
This page shows you how to create the key, where to store it, and what the basic sending code looks like.
Create the API Key
Open API Keys in Resend
Log in to the Resend dashboard and click "API Keys" in the left sidebar.
You see a list of your existing API keys (empty on a new account). Click the "Create API Key" button in the top right.
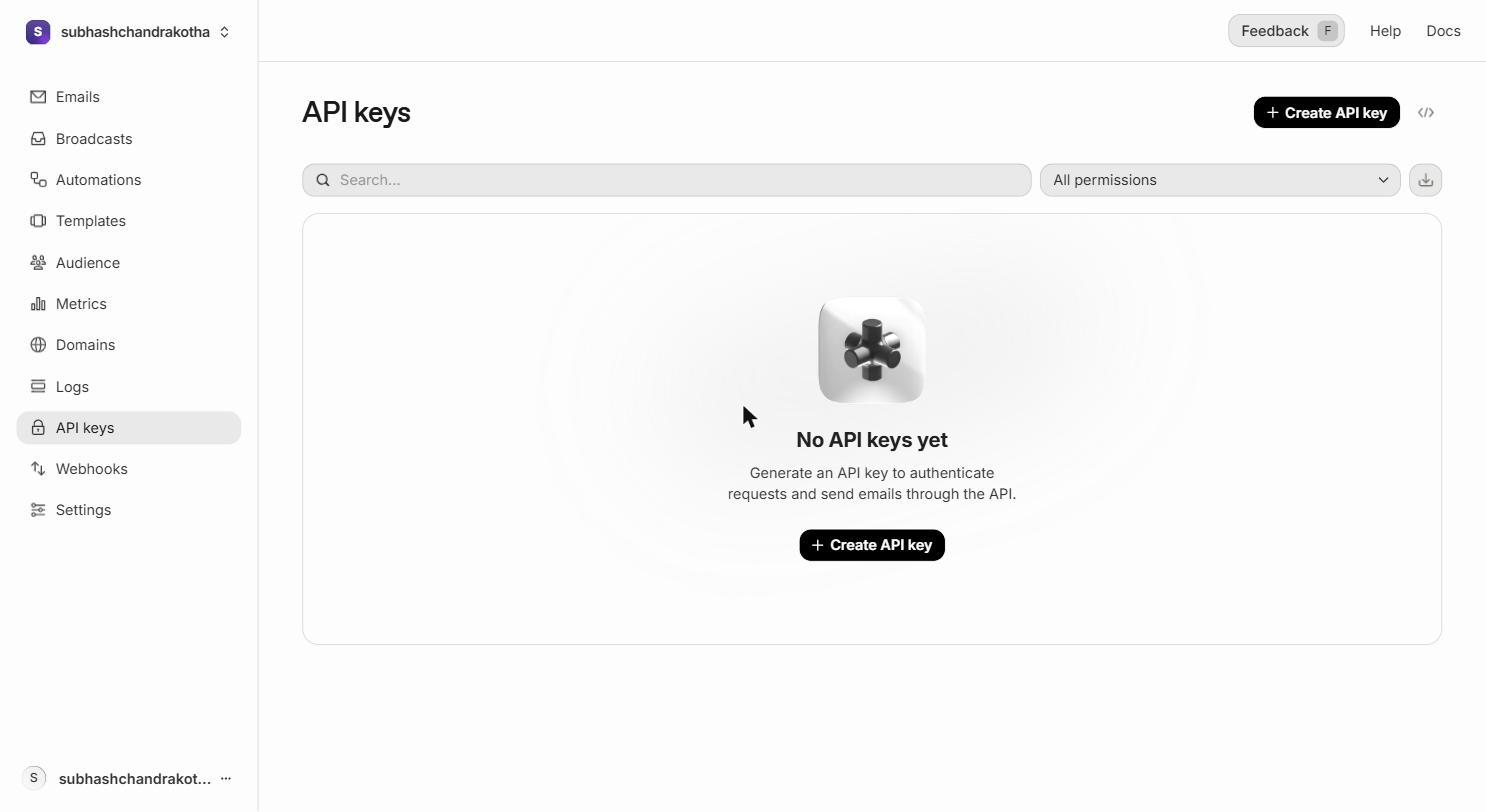 The API Keys page. Click the highlighted "Create API Key" button to start.
Name the Key
A form appears with a "Name" field.
Name the key clearly so you know which project and environment it belongs to — you may have several keys across multiple projects over time.
Good names:
Aurora Public School ProductionAurora Public School DevelopmentProject 2 DevTraining Projects
Avoid vague names like key1 or test — in six months you will not remember what they are for.
Set Permissions
The "Permission" dropdown has two options:
- Full Access — the key can send emails and access the full API (recommended for edge functions)
- Sending Access — the key can only send emails, not access logs or other API endpoints
Select "Full Access" for Supabase Edge Functions. Edge functions need to be able to send emails. The additional API access doesn't increase risk because the key lives in a server-side secret, never in the browser.
Set Domain Access
The "Domain access" dropdown controls which verified domains this key can send from:
- All domains — the key can send from any domain verified on your Resend account
- Specific domain — restrict the key to one domain
For most projects, "All domains" is fine. If you want strict isolation (for example, ensuring a client's key can only send from their domain), select their specific domain.
Create the Key
Click "Create".
Resend generates the key and displays it exactly once. The key looks like this:
It always starts with re_ and is approximately 40 characters long.
Copy this key immediately. Resend does not show the full key again after you close this screen. If you close the window without copying the key, you must create a new one — there is no "reveal key" button. The dashboard only shows you the first 8 characters of the key afterwards (for identification purposes only).
Save the Key to VaultMate (Mandatory)
Before you put the key anywhere else, save it to VaultMate.
VaultMate is the credentials database you set up as part of the program. Every secret, API key, and credential goes there — without exception.
Open VaultMate
Open VaultMate from your desktop. Navigate to your project (create one if it doesn't exist).
Create the credential entry
Click Add Credential and fill in:
| Field | Value |
|---|---|
| Title | Resend API Key |
| Category | API Key |
| Secret | the full key starting with re_ |
| URL | https://resend.com |
| Notes | which environment this is for (Production / Development) |
Save
Click Save. You now have a permanent, retrievable record of this key. If your .env file gets corrupted or your Supabase project is reset, you can retrieve the key from VaultMate without creating a new one and updating every deployment.
re_. If you see only the first 8 characters, you copied from the Resend dashboard list (which truncates keys). Go back to Resend and create a new key — you cannot recover a key after the creation dialog is closed.Add the Key as a Supabase Secret
The Resend API key does not go in your .env file for production. Edge functions run on Supabase's infrastructure, not on your local machine. Supabase has its own secure secret store for edge function environment variables. That is where the key belongs.
Putting the key in .env and committing it to Git — even accidentally — exposes it to anyone who can see the repository. Supabase secrets are encrypted at rest and never appear in any file.
Adding the Secret via Supabase CLI
With the Supabase CLI installed, run this command in your project terminal (replace the value with your actual key):
To confirm it was saved:
You will see RESEND_API_KEY in the list (with the value hidden).
Adding the Secret via Supabase Dashboard
If you prefer the web interface:
Go to supabase.com/dashboard → your project → Edge Functions in the left sidebar → Secrets tab. Click Add new secret. Enter RESEND_API_KEY as the name and your full key as the value. Click Save.
The secret is now available inside all your edge functions as Deno.env.get('RESEND_API_KEY').
supabase secrets list and confirm RESEND_API_KEY appears in the output (the value will be masked — that is expected and correct).For local development only: When testing edge functions on your local machine with supabase start, you can add the key to a .env.local file in your supabase/functions/ directory. This file stays on your machine and is never committed to Git. Production always uses Supabase secrets.
Using the Key in an Edge Function
Here is what sending a basic email looks like inside a Supabase Edge Function:
Let's read each part:
import { Resend } from 'npm:resend@3'
Imports the Resend library. In Supabase Edge Functions (which run on Deno, not Node.js), you import npm packages with the npm: prefix.
new Resend(Deno.env.get('RESEND_API_KEY'))
Creates a Resend client using the API key from Supabase secrets. Deno.env.get is Deno's equivalent of process.env in Node.js.
resend.emails.send({...})
The actual send call. The four fields:
from— the sending address (must be on your verified domain, oronboarding@resend.devfor dev)to— an array of recipient addressessubject— the email subject line (appears in the recipient's inbox)html— the email body as HTML
if (error) { throw new Error(...) }
Always check for errors after sending. An error here means the email did not send — handle it so the user knows something went wrong.
The "From" Format
Resend accepts the "From" field in two formats:
The display name format (Name <email>) is what recipients see in their inbox under the "From" column. Without it, they see the raw email address. Using the app name makes emails immediately recognizable and builds trust.
For Aurora Public School, use:
'Aurora Public School <noreply@aurorapublicschool.in>'for fee receipt and enrollment emails'Aurora Public School Support <support@aurorapublicschool.in>'for support-related emails
What Happens in the Resend Dashboard After Sending
Every email your code sends appears in Emails in the left sidebar within seconds of being sent.
Click any row to see:
- Delivery events — Resend accepted it, the recipient's server accepted it, it was delivered to inbox
- Timestamps — exactly when each step occurred
- Message ID — a unique identifier (the
data.idyour code logs)
If an email shows "Bounced" status:
- The recipient's email address doesn't exist
- The recipient's inbox is full
- The recipient's email server rejected the message
A bounce is not always your fault. Check the bounce reason in the delivery events before troubleshooting your code.
Multiple Keys — When to Create More Than One
You may want separate keys for separate concerns:
| Scenario | Create separate keys |
|---|---|
| Production vs development | Yes — different environments, different risk level |
| Multiple projects (Aurora Public School + a client site) | Yes — if one key is compromised, it only affects one project |
| Different team members | No — API keys belong to projects, not people |
When you create a key for a new environment or project:
- Create the key in Resend (name it clearly)
- Save it to VaultMate immediately
- Add it as a Supabase secret in the appropriate project
Rotating (Replacing) a Key
If you suspect a key has been exposed — posted in a chat message, committed to Git, sent via email — rotate it immediately:
- Create a new API key in Resend (same permissions)
- Save the new key to VaultMate (update the existing entry)
- Update the Supabase secret:
npx supabase secrets set RESEND_API_KEY=re_new_key - In the Resend dashboard → API Keys → click the three dots next to the old key → "Revoke"
The old key stops working the moment you revoke it. Emails sent before revocation are not affected.
Next Step
You have a key created and stored correctly. The next page covers writing proper email templates using React components — the same skill as building web components, applied to email.