Row Level Security (RLS)
The most important security feature in Supabase. Without it, any logged-in user can read every other user's data.
Why First
You have built a fee_records table. Your app is live. Parents can log in and view their children's fees.
Now, open your browser's developer tools (F12) and go to the Console tab. A curious user — or a malicious one — types:
Without RLS, they get back every fee record in your database. Every student's name, amount owed, payment status, parent details. One API call. All exposed.
This is not hypothetical. The Supabase JavaScript client and your database URL are visible to anyone who opens DevTools on your app. The anon key is designed to be public — it is what lets anonymous users reach your database at all. The security that decides what they can see is not in the key. It is in RLS policies.
RLS says: "This user can only see rows where user_id = their own ID." No matter how the query is written, no matter what a user types in DevTools, they physically cannot retrieve another user's rows. Supabase adds the filter at the database level, before any data leaves the server.
Excel analogy: Imagine an Excel file where every row has an "owner" column. Sheet protection that works like this: "Each person who opens the file can only see the rows where the owner column matches their Windows login name." Excel cannot do this. Supabase can — and must.
Enabling RLS on a Table
RLS must be enabled per table. It is off by default.
Via the Table Editor:
- In the left sidebar, click Table Editor
- Click on your table (e.g.,
fee_records) - Click the RLS disabled button near the top right — it toggles to RLS enabled
Via SQL Editor:
The moment you enable RLS, ALL access is blocked. No SELECT. No INSERT. No UPDATE. No DELETE — from anyone, including logged-in users. This is correct behaviour. You are now starting from "deny everything" and adding back only the access that should exist. Do not panic when your data stops loading. It means RLS is working. Now add policies.
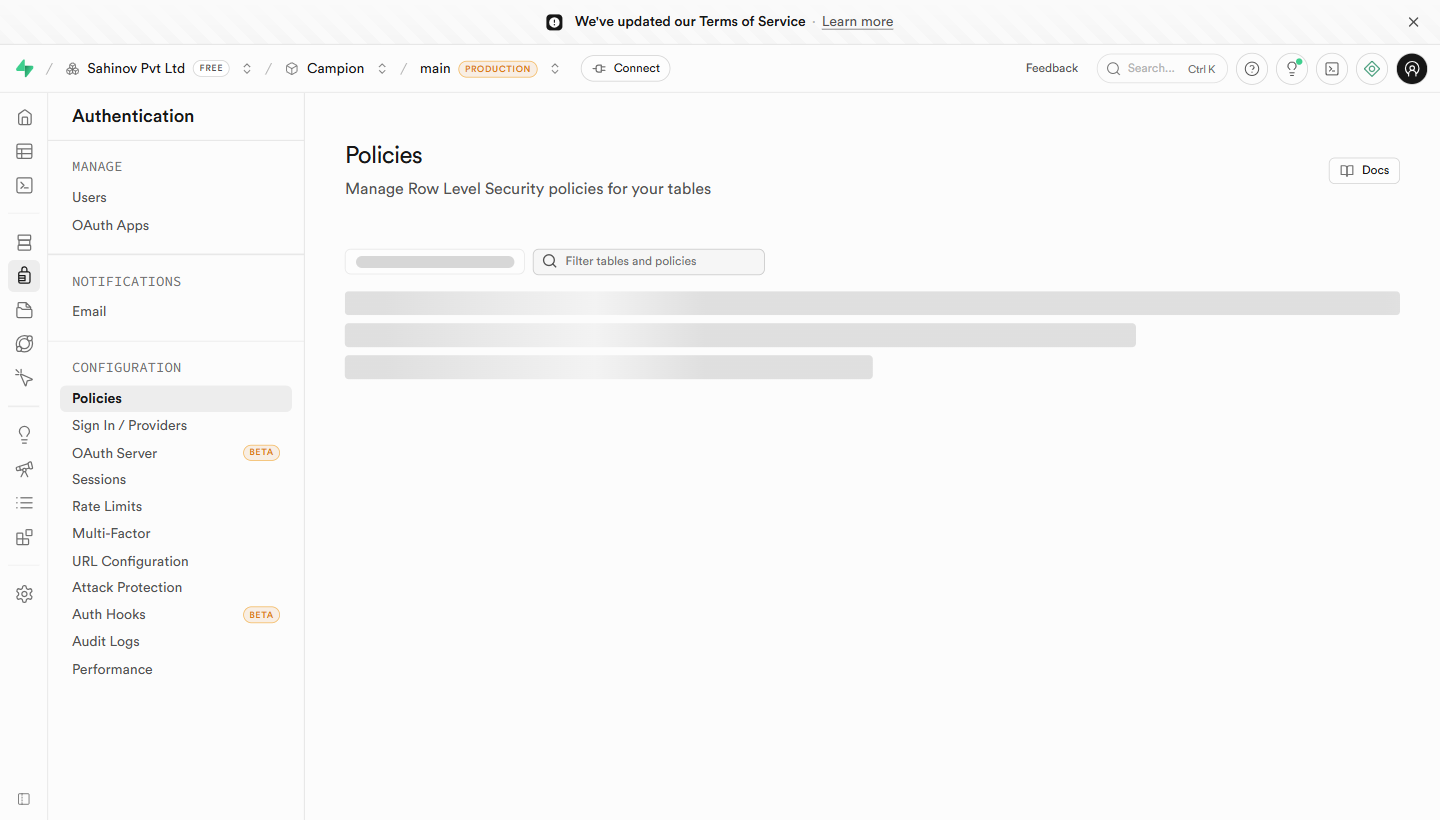 Policies view — every RLS policy across every table, grouped by table.
Creating Policies
A policy is a rule that says: under these conditions, allow this operation.
Via the dashboard:
Fill in the form:
- Policy name — a descriptive label such as "Parents can read own fee records"
- Allowed operation — SELECT, INSERT, UPDATE, DELETE, or ALL
- Target roles — usually
authenticated(logged-in users) oranon(public visitors) - USING expression — the condition for SELECT, UPDATE, DELETE (which rows can this user act on?)
- WITH CHECK expression — the condition for INSERT, UPDATE (what values are they allowed to write?)
The 4 Policies Every App Needs
Policy 1: Users can read their own rows
auth.uid() is a Supabase function that returns the UUID of the currently logged-in user. This policy says: "Return this row only if the user_id column matches the logged-in user's ID."
Policy 2: Logged-in users can insert their own rows
This prevents a user from inserting a row that claims to belong to someone else — they cannot set user_id to a different person's ID.
Policy 3: Users can update their own rows
Policy 4: Admins can read everything
This checks if the person making the request has role = 'admin' in your profiles table. If yes, they can see every row. If no, this policy doesn't apply — the user falls back to other policies (or sees nothing if there are none that match).
What auth.uid() Is
auth.uid() is a PostgreSQL function provided by Supabase. When a user logs in, Supabase issues them a signed JWT (a token). Every database request includes that token. Supabase verifies it and makes auth.uid() return the ID inside that token.
You cannot fake auth.uid(). You cannot change it from the client side. It is set by Supabase's auth server and verified cryptographically. This is why it is safe to use as the foundation of all your security policies.
Testing a Policy
In the Policies view, next to each policy is a Test policy button. This opens a panel where you can:
- Simulate a request as a specific user (by their UUID)
- See whether the policy would allow or deny the operation
- Check the output without writing any application code
Always test a policy immediately after creating it. The most common mistake is a typo in the user_id column name — your table might call it created_by or owner_id — and the policy silently blocks everything.
Checking Which Tables Have RLS Enabled
Run this in the SQL Editor to see the RLS status of all your tables:
SELECT tablename, rowsecurity FROM pg_tables WHERE schemaname = 'public';
rowsecurity = true means RLS is on. rowsecurity = false means that table is wide open to any authenticated user.
rowsecurity = true. If any shows false, run ALTER TABLE tablename ENABLE ROW LEVEL SECURITY; (replacing tablename) in the SQL Editor, then run the check query again.Before you deploy to production, run this query. Every table with rowsecurity = false that contains user data is a security hole. The verification checklist at the end of this section will remind you to run it.
The Security Advisor
Supabase ships a built-in Security Advisor that scans your project for the most common RLS mistakes — tables with RLS off, public tables exposing data, policies that always return true. Find it in Database → Advisors → Security.
 Security Advisor — every finding is a checklist item, with a link straight to the table or policy that needs attention.
Run this every time you finish configuring RLS, and again right before any production deploy. Treat every red item as blocking — it almost always represents a real exposure.
Common Mistakes
| Mistake | Symptom | Fix |
|---|---|---|
| Enabled RLS but forgot policies | Data stopped loading entirely | Add SELECT policy for authenticated role |
| Wrong column name in policy | Policy created successfully but data still blocked | Check exact column name — user_id vs created_by vs owner_id |
Policy targets anon instead of authenticated | Logged-in users get no data | Change target role to authenticated |
| Forgot to enable RLS on a table | All users can read all rows | Run ALTER TABLE tablename ENABLE ROW LEVEL SECURITY |
| Admin policy references wrong role value | Admin sees nothing | Check what role value is stored in profiles — admin vs Admin vs ADMIN are different |