Your First Repository
Create a repository, clone it to your laptop, and make your first commit. This is the cycle you'll repeat every single day as a developer.
What a repository is
A repository (usually shortened to repo) is a folder that contains all the files for one project — along with the complete history of every change ever made to those files.
Think of it like an Excel workbook. A workbook contains multiple sheets, formulas, and data — everything for one purpose, in one place. A repository is the same idea: one project, all its files, in one place. Except instead of saving over the file each time, every save is recorded permanently as a snapshot in history.
When that repository lives on GitHub, it also becomes:
- A cloud backup (your work is safe even if your laptop dies)
- A collaboration point (teammates can download your code and contribute)
- A deployment source (Vercel can read from GitHub and publish your app automatically)
Step 1 — Create a new repository on GitHub
Go to github.com and sign in
You should already be signed in. If not, sign in now.
Click the green "New" button
On your GitHub dashboard (the homepage after logging in), look at the left sidebar. At the top, under "Top Repositories", you'll see a green button labeled New. Click it.
Alternatively, click the + icon in the top right corner of any GitHub page (next to your profile photo) and select New repository from the dropdown.
Fill in the repository details
GitHub shows a "Create a new repository" form. Fill it in as follows:
Repository name: Type a name for your project. Use lowercase letters and hyphens, no spaces.
Good examples: my-portfolio, aurora-school, ca-firm-portal
This name appears in the URL: github.com/your-username/my-portfolio
Description (optional): Write a one-sentence description. Example: "Personal portfolio website built with React and Tailwind." This appears on your profile and in search results.
Public or Private:
| Public | Private |
|---|---|
| Anyone on the internet can view it | Only you (and people you invite) can view it |
| Good for your portfolio, open source projects | Good for client work, anything with sensitive code |
| Counts toward your developer profile | Does not appear on your public profile |
For your first practice repository, choose Public. For client projects, always use Private.
Initialize this repository with a README: Tick this checkbox.
A README is a file called README.md that appears on your repository's homepage. It's the first thing anyone reads when they visit your project. Think of it as the cover page of a report — it tells people what the project is and how to use it.
Without this checkbox, the repository starts empty and there's a bit more work to set it up. With it ticked, GitHub creates the README for you and you're ready to clone immediately.
Leave the .gitignore and license fields as "None" for now.
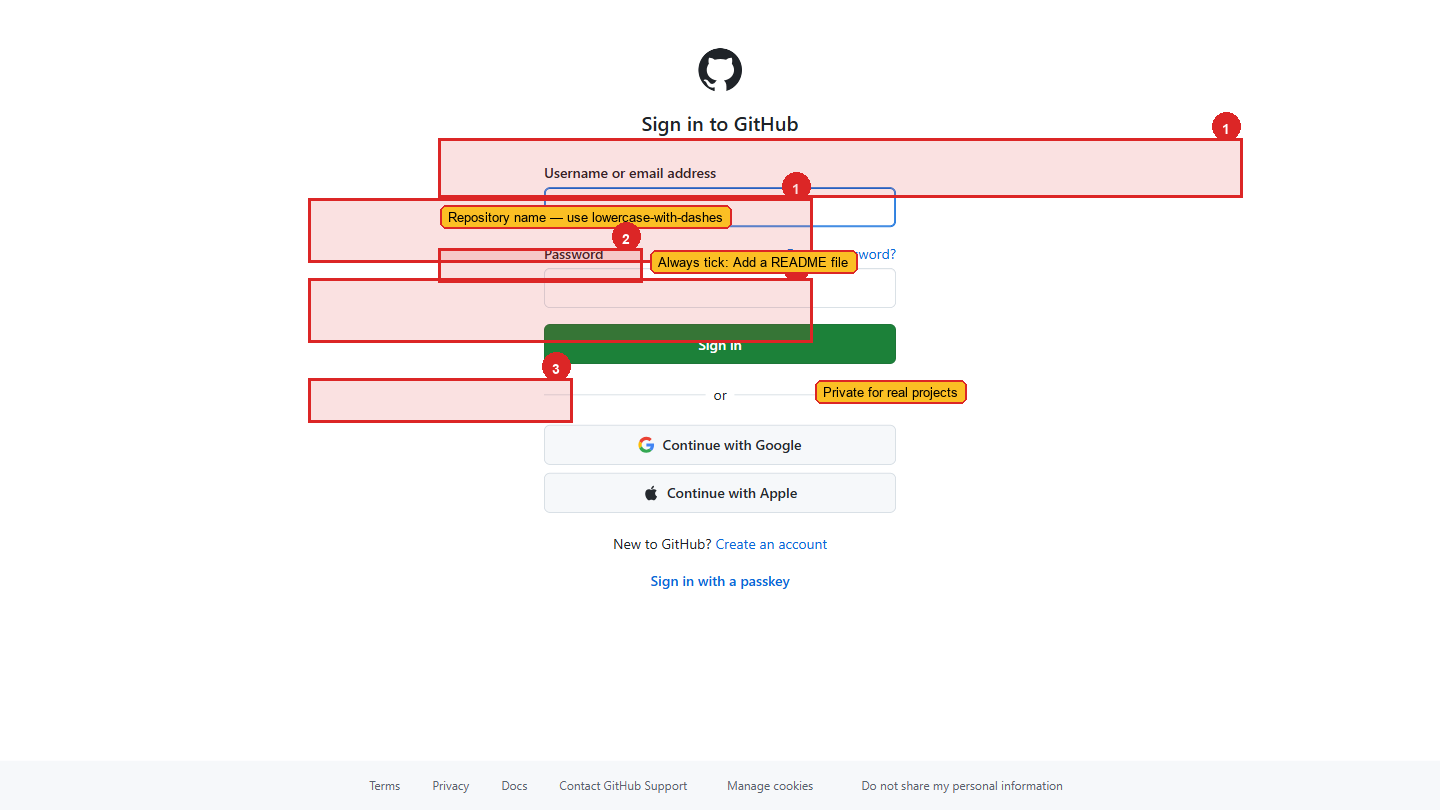 The Create repository form. The name and visibility (Public/Private) are the two decisions that matter most.
Click "Create repository"
The green button at the bottom of the form. GitHub creates the repository and takes you to its homepage.
You'll see:
- Your repository name at the top
- A code area showing the README file content
- A green Code button on the right side
- A tab bar with: Code, Issues, Pull requests, Actions, Settings
Step 2 — Clone the repository to your laptop
The repository exists on GitHub (in the cloud). To work on it, you need to clone it — download a copy to your laptop, connected to GitHub so you can send your changes back up.
Clone is the word developers use instead of "download" — because it's not just a download. It creates a linked copy that knows where it came from and can sync changes in both directions.
Excel analogy: Cloning a repository is like downloading an Excel file from SharePoint to your laptop. The local copy and the online copy are linked — changes you save locally can be synced back to SharePoint, and changes others make online can be pulled down to you.
Get the clone URL
On your repository page on GitHub, click the green Code button (right side, above the file list). A small dropdown appears.
Make sure the HTTPS tab is selected (not SSH). You'll see a URL that looks like:
Click the copy icon (two overlapping squares) to the right of the URL to copy it.
Open your terminal
Open Command Prompt (Windows) or Terminal (Mac). Navigate to the folder where you want your projects to live. Most developers keep all their projects in one place.
Recommended location on Windows:
To navigate there:
Run git clone
Type the following command, replacing the URL with the one you copied:
What you'll see:
Git downloads everything — in this case, just the README file — and creates a folder called my-portfolio in your current directory.
Open the folder in VS Code
code . opens VS Code in the current folder. VS Code should open showing your project files in the left sidebar, with README.md visible.
Step 3 — The daily workflow: add, commit, push
This is the cycle you'll do dozens of times every day. Once it becomes automatic, version control stops feeling like extra work and starts feeling like a safety net.
Make a change
In VS Code, click on README.md in the left sidebar to open it. You'll see:
Add a line below it:
Save the file with Ctrl+S (Windows) or Cmd+S (Mac).
Stage the change
Staging means telling Git: "include this file in my next snapshot." You can have 20 changed files and choose to stage only 3 — the commit will only include those 3.
To stage every changed file at once (use carefully — only when you're sure you want all changes):
Commit the change
A commit is the snapshot. The -m flag lets you attach a message describing what changed.
What you'll see:
Write good commit messages. They're the only record of why a change was made:
| Bad | Good |
|---|---|
fix | Fix login redirect on mobile |
update | Update homepage hero text per client feedback |
stuff | Add contact form with email validation |
Use the imperative mood — write it like a command: "Add", "Fix", "Update", "Remove". Not "Added" or "Fixed".
Push to GitHub
Pushing sends your committed snapshots from your laptop to GitHub.
What you'll see:
Verify on GitHub
Go to github.com/your-username/my-portfolio in your browser. Refresh the page. You'll see:
- Your updated README text appearing on the repository homepage
- The commit message "Update README with project description" shown next to the file
- The time of the commit (e.g., "2 minutes ago")
Reading your commit history
On your repository page, click the clock icon near the top right (it shows something like "2 commits"). This is your full commit history.
Each commit shows:
- The commit message
- The author (you)
- The exact date and time
- A commit hash — a unique ID like
4a7b2c1— that identifies this exact snapshot
Click any commit to see a diff — a side-by-side comparison showing exactly what changed. Lines removed are shown in red; lines added are shown in green.
This is your audit trail. Six months from now, you can come back here and see exactly what changed on any given day and why.
What a README.md should contain
Every project should have a README. At minimum:
The README is the cover page of your project. If a client or collaborator lands on your repository, the README is what they read first.
Quick reference — the three commands you'll use every day
These three commands, in this order, are 80% of your daily Git usage.