Installing Git
Step-by-step Git for Windows installation — which installer options to choose, what each choice means, and how to verify the installation.
Git is a command-line tool. Unlike most software you've installed, there is no icon on your desktop afterwards, no colorful interface that opens. Git lives in your terminal and you interact with it by typing commands.
This is not a problem. This is how professional tools work. By the end of the next page, typing Git commands will feel as natural as typing Excel formulas.
The installer has more screens than Node.js, and several of those screens have options that matter. This guide tells you exactly what to choose on every screen.
Check if Git Is Already Installed
Before downloading anything, check:
Open a Command Prompt and type:
If you see something like git version 2.47.0 — Git is already installed. Skip to the end of this page and move on to Git Configuration.
If you see 'git' is not recognized — continue with the installation below.
Download Git for Windows
Open your browser and go to git-scm.com/download/win.
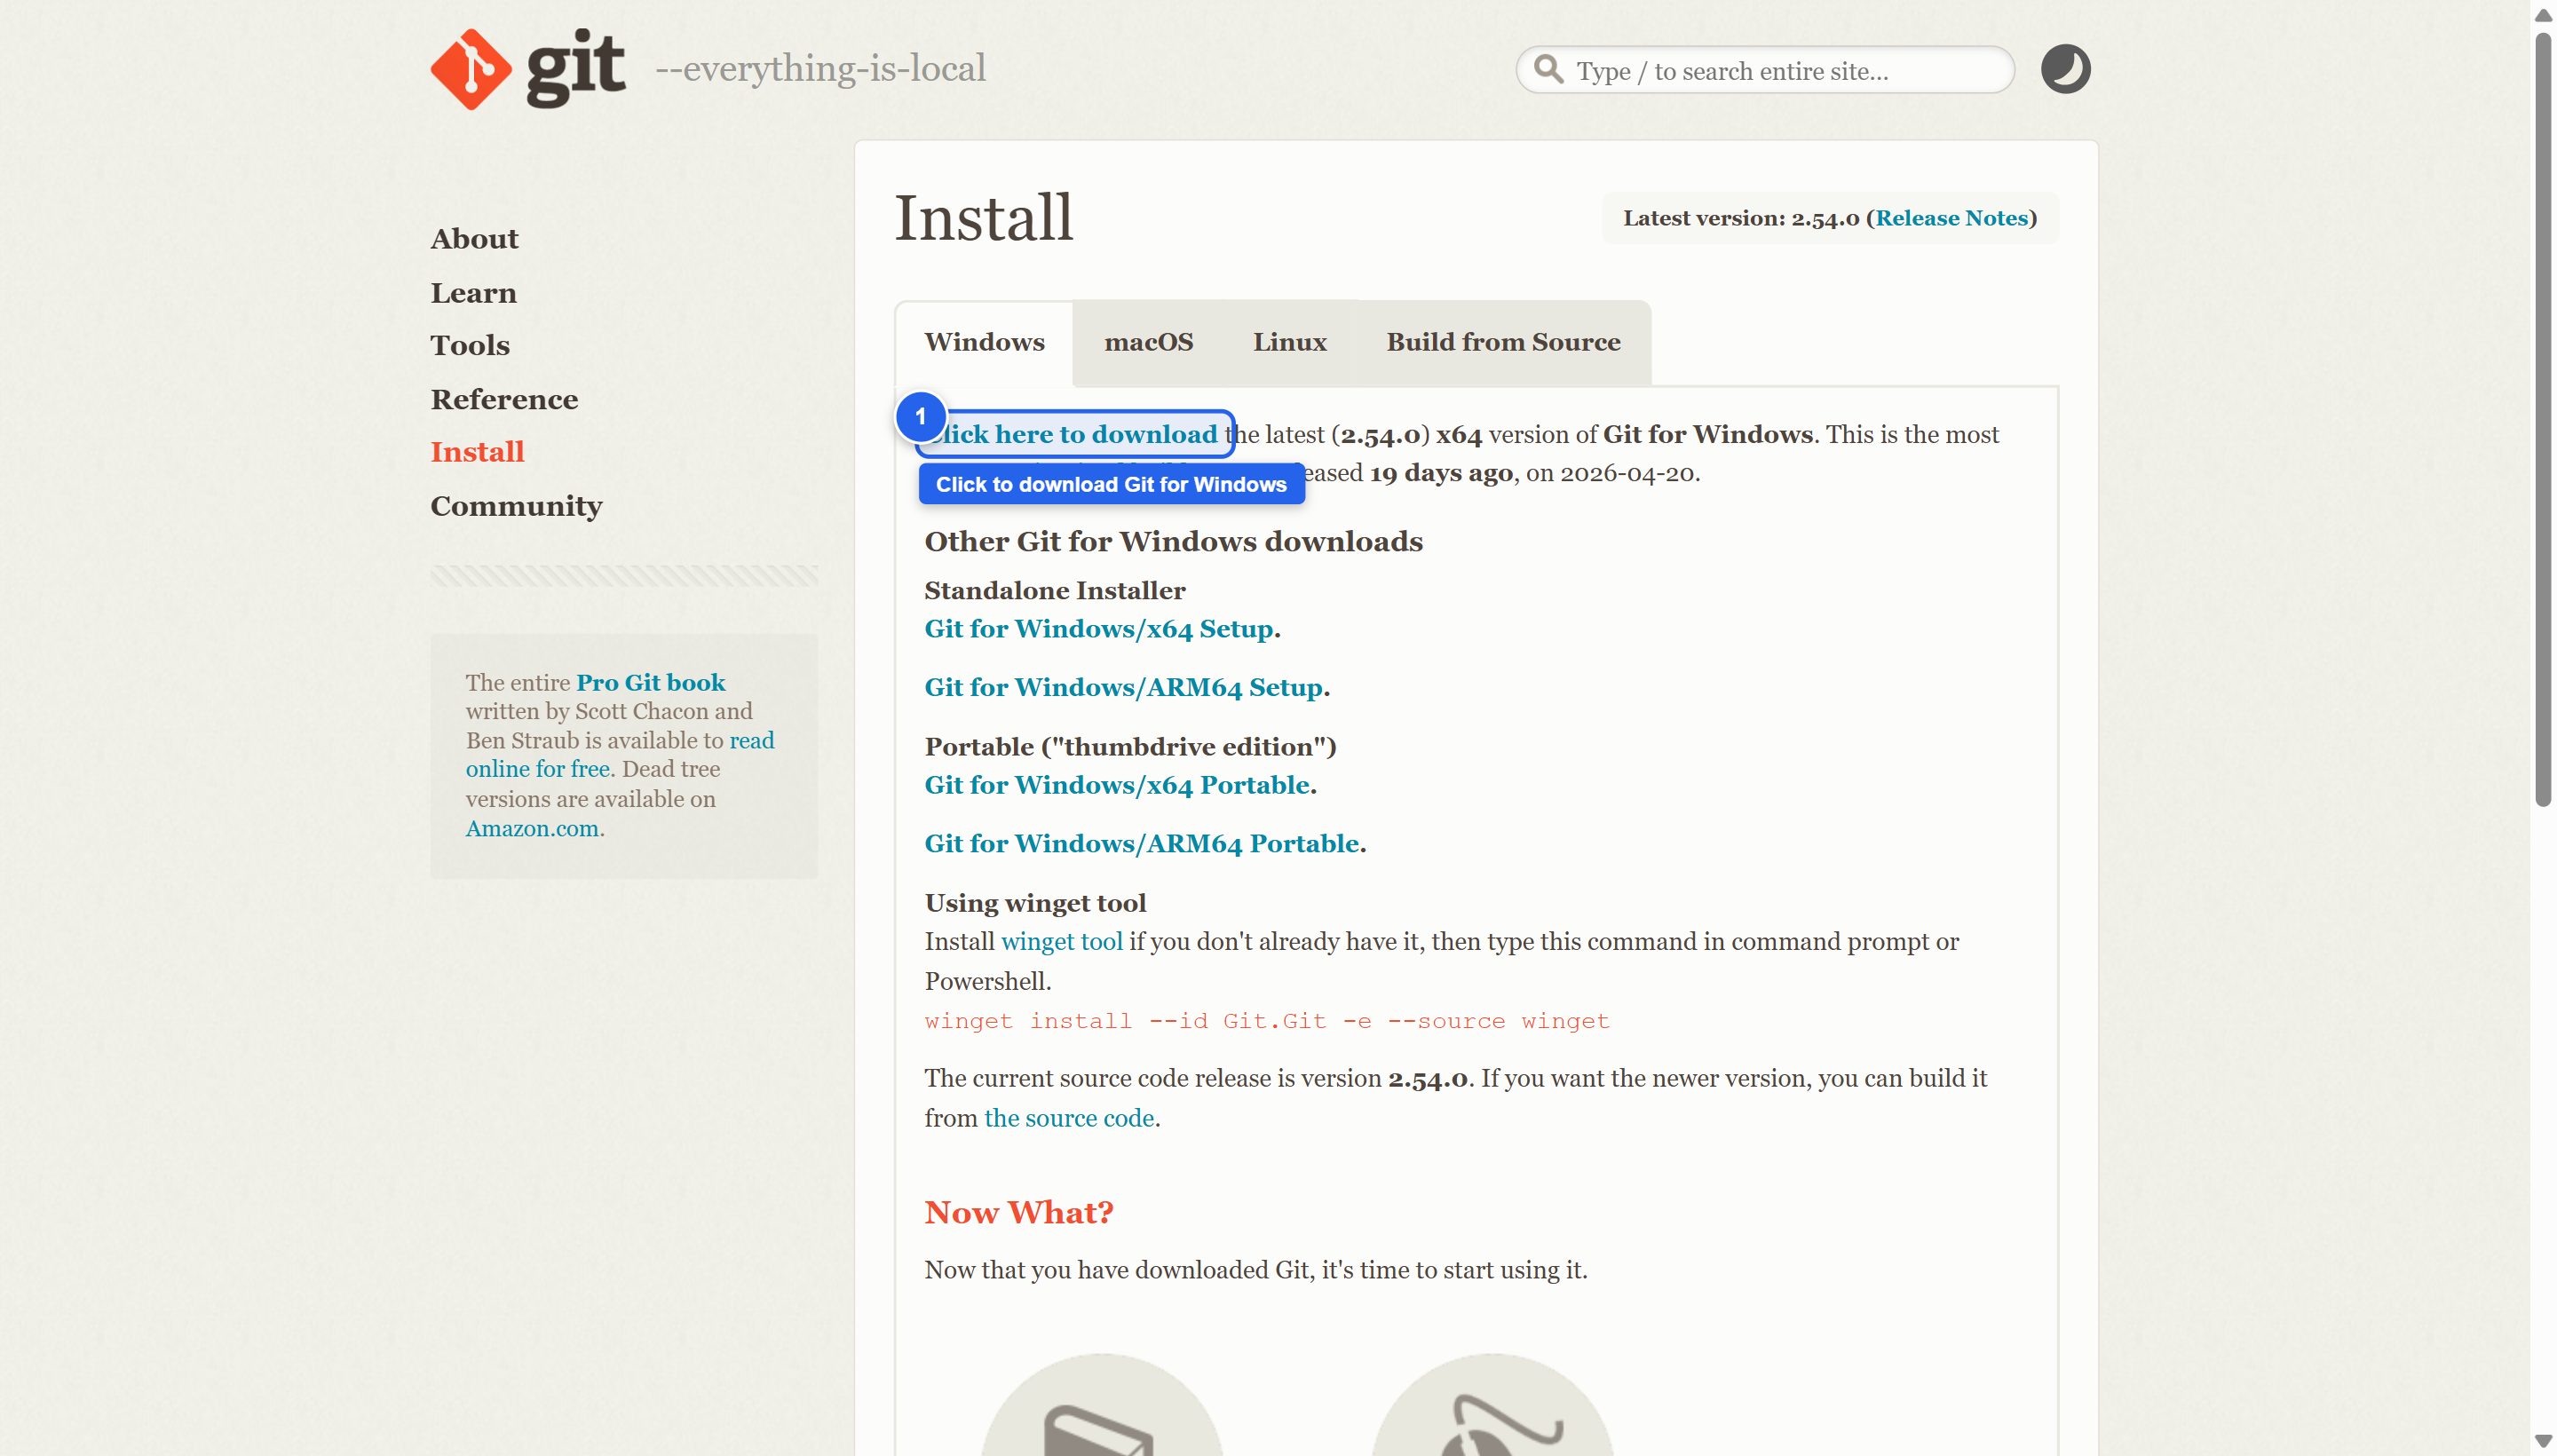 The Git for Windows download page. The download starts automatically. If it doesn't, click the "Click here to download" link under the latest version number.
The page detects Windows automatically. You will see a section labeled "Click here to download" with the latest version. The download should start automatically within a few seconds. If it doesn't, click the link manually.
The downloaded file is named something like Git-2.47.0-64-bit.exe — approximately 60 MB.
Why git-scm.com? This is the official Git project's download page. "SCM" stands for Source Control Management — another name for version control systems. This is the only place to download the official Windows Git package.
Installer Walkthrough
Double-click the downloaded .exe file. Windows will ask: "Do you want to allow this app to make changes to your device?" Click Yes.
The installer opens. There are many screens. Work through each one carefully.
License Information
The first screen shows the GNU General Public License. This is the license under which Git is distributed — free, open source, no cost. Scroll down (or don't) and click Next.
Select Destination Location
The installer proposes C:\Program Files\Git. Leave this exactly as it is and click Next.
Select Components
You see a list of checkboxes. The defaults are:
- Git Bash Here (checked)
- Git GUI Here (checked)
- Git LFS (Large File Support) (checked)
- Associate .git* configuration files with the default text editor (checked)
- Associate .sh files to be run with Bash (checked)
- Add a Git Bash Profile to Windows Terminal (checked)
- Scalar (Git add-on for managing large-scale repositories) (may be checked)
Leave all defaults in place and click Next.
What is Git Bash? Git Bash is a terminal application that comes with Git. It gives you a Unix-style command prompt on Windows. You will use this often — it's more powerful than the standard Windows Command Prompt for development work. It's the terminal where Git commands behave most reliably on Windows.
Select Start Menu Folder
The installer asks where to put shortcuts in your Start Menu. Leave it as "Git" and click Next.
Choosing the Default Editor Used by Git
This screen asks which text editor Git should open when you need to write a commit message or resolve a conflict in a text format.
The default is Vim, which is a terminal-based editor with an unusual keyboard interface. For beginners, Vim is confusing. Change this.
Click the dropdown and select "Use Visual Studio Code as Git's default editor".
If VS Code is not installed yet, it won't appear in the list. In that case, leave the default (Vim) for now — you can change this after installing VS Code by running:
Click Next.
Adjusting the Name of the Initial Branch in New Repositories
This screen asks what the first branch in a new repository should be called.
You see two options:
- "Let Git decide" — historically this was "master"
- "Override the default branch name for new repositories" — with a text field showing "main"
Select "Override the default branch name for new repositories" and ensure the text field says main.
The industry has standardized on main as the default branch name. This choice ensures your local Git matches GitHub's behavior.
Click Next.
Adjusting Your PATH Environment
Three options appear:
- "Use Git from Git Bash only" — Git only works inside Git Bash, not the standard Command Prompt or PowerShell
- "Git from the command line and also from 3rd-party software" (recommended)
- "Use Git and optional Unix tools from the Command Prompt" — overwrites some Windows tools, not recommended
Select "Git from the command line and also from 3rd-party software" (the middle option, which should already be selected).
This makes git available everywhere — in Command Prompt, PowerShell, Git Bash, and inside VS Code's integrated terminal. Click Next.
Choosing HTTPS Transport Backend
Two options:
- "Use the OpenSSL library" (recommended, already selected)
- "Use the native Windows Secure Channel library"
Leave the selection on "Use the OpenSSL library" and click Next.
Configuring the Line Ending Conversions
This is an important screen. It affects how Git handles line endings — an invisible character at the end of each line in text files.
Windows uses CRLF (Carriage Return + Line Feed) for line endings. Linux and macOS use just LF. When Windows developers and Mac/Linux developers work on the same project, these differences cause unnecessary noise in file comparisons.
Three options:
- "Checkout Windows-style, commit Unix-style line endings" (recommended)
- "Checkout as-is, commit Unix-style line endings"
- "Checkout as-is, commit as-is"
Select "Checkout Windows-style, commit Unix-style line endings" (first option, already selected on Windows installs).
This means: when you check out files onto your Windows machine, Git converts them to Windows line endings (so they look right in your editor). When you commit back, Git converts to Unix line endings (so they work correctly on servers and for other OS users). Best of both worlds.
Click Next.
Configuring the Terminal Emulator
Two options:
- "Use MinTTY (the default terminal of MSYS2)" (recommended)
- "Use Windows' default console window"
Select "Use MinTTY" (already selected). Git Bash will use MinTTY, which is more capable than the standard Windows console — better colors, resizing, Unicode support.
Click Next.
Choose the Default Behavior of git pull
Three options:
- "Default (fast-forward or merge)" (recommended)
- "Rebase"
- "Only ever fast-forward"
Leave the selection on "Default (fast-forward or merge)" and click Next.
Choose a Credential Helper
Git needs to store your GitHub username and password so you aren't asked for them on every push. Two options:
- "Git Credential Manager" (recommended, already selected)
- "None"
Leave the selection on "Git Credential Manager" and click Next. The Credential Manager securely stores your GitHub credentials in Windows Credential Store — the same place Windows stores passwords for other services.
Configuring Extra Options
Two checkboxes:
- "Enable file system caching" — checked (leave it)
- "Enable symbolic links" — unchecked (leave it)
File system caching speeds up Git operations by keeping recently accessed information in memory. Leave it checked. Click Next.
Configuring Experimental Options
You may see a screen with experimental features, all unchecked. Leave everything unchecked. Click Install.
The installation runs — the progress bar fills. This takes 1–2 minutes.
Installation Complete
The final screen says "Completing the Git Setup Wizard". You'll see two checkboxes:
- "Launch Git Bash" — check this if you want Git Bash to open immediately
- "View Release Notes" — uncheck this
Click Finish.
Verify the Installation
Open a new Command Prompt, PowerShell, or Git Bash window and type:
You should see:
The exact numbers will vary — any version 2.30 or higher is fine. The important thing is that the command runs without an error.
If git is still not recognized after installing: Close all terminal windows and open a new one. If that doesn't fix it, restart your computer. Git modified the PATH, but some existing terminal sessions don't pick up PATH changes until a full restart.
What You Now Have
Git Bash — A new application in your Start Menu. Git Bash is a terminal that feels like Linux/macOS on your Windows machine. You'll use it for Git commands, especially when Command Prompt behaves differently. To open: Start menu → search "Git Bash".
Git in Command Prompt and PowerShell — git now works in every terminal environment, not just Git Bash.
Git in VS Code — VS Code's built-in terminal and its Source Control panel (the branching icon in the left sidebar) now use the Git you just installed.
Git Bash vs Command Prompt — When to Use Each
| Git Bash | Command Prompt / PowerShell |
|---|---|
Git commands (git commit, git push) | Running npm and Node.js commands |
Unix-style commands (ls, cat, touch) | Windows-style commands (dir, type) |
Shell scripts (.sh files) | PowerShell scripts (.ps1 files) |
| Works identically on Windows, Mac, Linux | Windows-only |
For this program, use Git Bash for all Git operations. It behaves identically to what you'd see on a Mac or Linux machine, which means the instructions you find online will work without translation.
For Node.js operations (npm install, npm run dev), either terminal works — use whichever you have open.
The .git Folder
When you initialize a Git repository in a project folder (you'll do this in the First Commands section), Git creates a hidden folder inside your project called .git.
This folder contains the entire version history of your project — every commit, every file at every point in time, every branch, every tag. It is small in size (usually a few MB even for large projects, because Git stores only the differences between versions, not full copies).
You should never edit or delete anything inside .git manually. Git manages it entirely. Think of it as Excel's AutoRecover folder — you know it exists, you're glad it exists, but you never open it and start editing files inside it.
Windows hides this folder by default because it has no use to regular users. Git developers occasionally need to inspect it, but as a developer using Git commands, you never interact with it directly — the git commands are your interface.
If you accidentally delete the .git folder, you lose all version history for that project. The files themselves remain intact, but all commit history and branches are gone. This is irreversible. Treat .git as sacred. Don't delete it. Don't move it. Don't rename it.
Next Step
Git is installed. Next: configure your identity in Git before you make your first commit.