Account Setup
Creating your Expo account, installing the EAS CLI, and verifying your login before touching any app code.
Expo account setup has two parts: creating the account on expo.dev, and installing the EAS command-line tool on your laptop. Both are required — the account is where your builds and projects live, and the CLI is how you interact with EAS from your terminal.
This takes about 10 minutes.
Before You Start
You need these already set up:
- Node.js and npm installed (from the Node.js setup section)
- A terminal you're comfortable running commands in (VS Code's integrated terminal is fine)
- The project Gmail account available (you'll use it for the Expo account)
Creating Your Expo Account
Go to expo.dev
Open your browser and navigate to expo.dev. Click "Sign Up" in the top right.
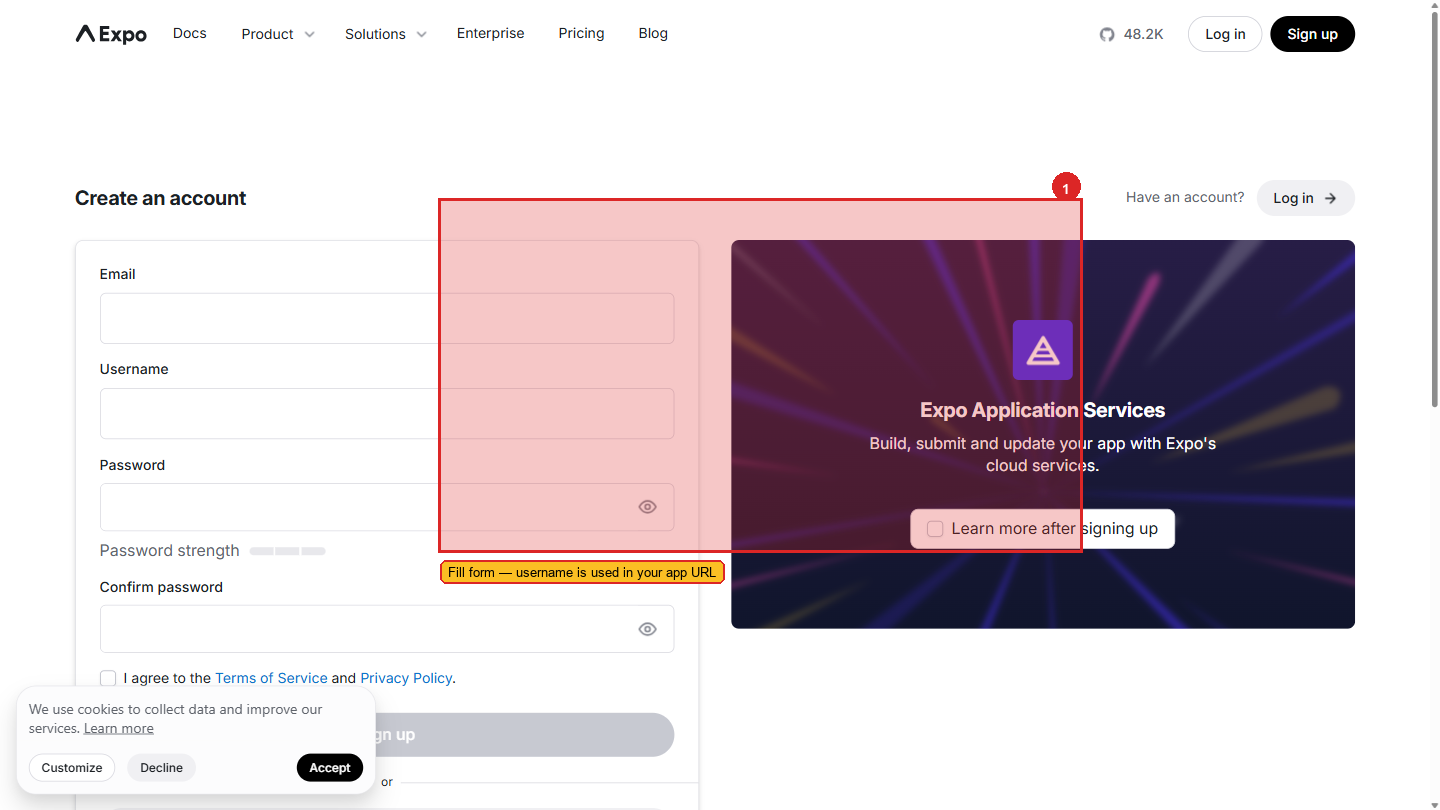 The Expo sign-up form. Choose your username carefully — it appears in your project URLs and cannot be changed easily.
Fill in the registration form
| Field | What to enter |
|---|---|
| Username | A short, lowercase identifier — this appears in your project URLs. For Aurora Public School: sahinov-dev or similar. For personal projects: your name or handle. |
| Use the project Gmail account | |
| Password | A strong password — save it in your password manager |
Click "Sign Up".
Verify your email
Expo sends a verification email. Open it and click the confirmation link. You cannot create EAS builds until your email is verified.
Explore the Expo dashboard
 The Expo account dashboard. Sidebar navigation: Projects, Builds, Submissions, Updates, Account Settings. The dashboard is initially empty until you trigger your first EAS command in a project.
After verification, you land on the Expo dashboard at expo.dev. The main areas:
| Section | What it shows |
|---|---|
| Projects | All your Expo apps — each one is a project with its own build history |
| Builds | History of all EAS Build jobs across all your projects |
| Submissions | App Store and Play Store submission history |
| Updates | History of OTA (over-the-air) updates pushed via EAS Update |
| Account Settings | Profile, credentials, two-factor auth |
The dashboard is currently empty — no projects yet. Projects appear here automatically the first time you run eas build in a project.
Installing EAS CLI
EAS CLI is the command-line tool you use to trigger builds, push updates, and submit to app stores. It runs in your terminal.
Open your terminal
Open VS Code and open the integrated terminal (View → Terminal, or `Ctrl + `` on Windows).
Install EAS CLI globally
The -g flag installs it globally — meaning it's available in any terminal on your machine, not just in one project folder. This is correct for CLI tools you use across multiple projects.
If you see a permission error on macOS/Linux: Run sudo npm install -g eas-cli and enter your system password. On Windows, this error is less common.
Verify the installation
You should see a version number like 15.0.0 or higher. If you see "command not found", the installation did not succeed — check that Node.js is correctly installed and try again.
Log in to your Expo account
The CLI prompts you for your Expo username and password. Enter the credentials you just created.
Confirm you're logged in
Run eas whoami. This prints your Expo username. If it prints your username, you're authenticated and ready to use EAS. If it prints "Not logged in", run eas login again.
eas whoami should print your Expo username (not "Not logged in"). If you see "command not found", the EAS CLI was not installed correctly — re-run the install step.Understanding the EAS CLI Commands
You won't use all of these right away — but knowing they exist helps you understand what EAS can do.
| Command | What it does | When you use it |
|---|---|---|
eas whoami | Print logged-in username | Verify your login |
eas build:configure | Add EAS build configuration to your project | First time setting up EAS in a project |
eas build -p android | Start an Android build | When you want to create an APK or AAB |
eas build -p ios | Start an iOS build | When you want to create an IPA |
eas build:list | List recent builds for this project | Check build status |
eas submit -p android | Submit Android build to Play Store | When ready to publish |
eas submit -p ios | Submit iOS build to App Store | When ready to publish |
eas update | Push an OTA update to users | After fixing a bug without native changes |
eas credentials | Manage signing keys and certificates | Advanced — usually handled automatically |
For now, you only need eas whoami to confirm setup. The others are covered in the relevant pages.
The Expo Dashboard — Your Project View
Once you run your first EAS command in a project, it appears in the dashboard. What you'll see per project:
Builds tab
| Column | What it shows |
|---|---|
| Status | Building / Finished / Error |
| Platform | Android or iOS |
| Profile | Which build profile (development / preview / production) |
| Build started | Timestamp |
| Duration | How long the build took |
| Download | Link to download the APK or IPA |
Updates tab
Shows every OTA update you've pushed via eas update, including which branch it went to and how many devices have received it.
Submissions tab
Shows Play Store and App Store submission history — status (submitted, approved, rejected) and timestamps.
Members (for team projects)
When you're working as a team on Aurora Public School, you can invite other developers to your Expo organisation so they can trigger builds and view logs.
Access Tokens — For CI/CD Builds
When you eventually wire EAS Build into a GitHub Actions workflow (so builds trigger automatically on a tag push), you need an access token rather than your interactive eas login credentials. CI runners cannot type a password.
To create one: profile menu → Settings → Access Tokens → Create. Name it descriptively (e.g. CI/CD — Aurora Public School) and copy the token value when shown. Add it to GitHub Actions as the secret EXPO_TOKEN. Your workflow can now run:
You only need this when setting up automated builds — for manual development, eas login from your terminal is the right path.
A Note on Build Minutes
Free plan build limits:
- 30 builds per month across all your projects combined
- Builds run on shared infrastructure — during busy periods, your build may wait 5–15 minutes in a queue before starting
- Build duration is typically 5–15 minutes for a standard React Native project
- The free plan resets on the 1st of each month
30 builds per month is enough for this workshop. If you're hitting the limit, it usually means you're building too frequently — use Expo Go for development testing and only trigger EAS builds when you genuinely need to test a native feature or prepare for store submission.
What You Have Now
- An Expo account at expo.dev, email verified
- EAS CLI installed on your laptop
- Authenticated:
eas whoamiprints your username
The next step is setting up Expo Go on your phone — the fastest way to test your app during development without any build wait times.